기존의 iOS Share Extension은 ShareViewController라는 작은 창을 이용하게 되어있다. 이 Share Extension을 요구사항에 맞게 풀스크린으로 제작하는 방법을 공유해본다.
작업환경
- Xcode 9.4.1
- Swift 4.1
- iOS 11.3, 11.4
EntryViewController 작성
우선 공유 익스텐션에 접근시 가장 먼저 띄워줄 EntryViewController를 작성해준다. 기존에는 ShareViewController를 MainInterface.storyboard를 통해 팝업시켜주도록 되어있는데, 추후에 Info.plist를 수정하여 EntryViewController를 최초로 띄워주도록 변경하게 된다.
import UIKit

@objc(EntryViewController)

class EntryViewController : UIViewController {
    override func viewWillAppear(_ animated: Bool) {
        super.viewWillAppear(animated)
        let shareVC = ShareViewController()
        shareVC.sharingData = self.extensionContext
        let nav = UINavigationController(rootViewController: shareVC)
        self.present(nav, animated: false)
    }
}
viewWillAppear 메소드에서 공유 익스텐션에 사용할 ShareViewController를 생성해주고, 네비게이션 컨트롤러에 집어넣어 띄워주게 된다. 공유할 데이터, 파일은 self.extensionContext이며, 변수에 담아 사용할 수 있다. 특정 조건에 따라 공유 익스텐션의 팝업 여부를 결정 지으려면 이 곳에서 분기처리하면 된다. (메인 앱 로그인 여부에 따라 공유기능 띄우지 않기 등)
Info.plist 변경
Info.plist를 수정하여 기존 MainInterface.storyboard 팝업 -> EntryViewController 팝업으로 변경해준다.
// 기존 Info.plist
...
<dict>
    <key>NSExtensionAttributes</key>
    <dict>
        <key>NSExtensionActivationRule</key>
        <string>TRUEPREDICATE</string>
    </dict>
    <key>NSExtensionMainStoryboard</key>
    <string>MainInterface</string>
    <key>NSExtensionPointIdentifier</key>
    <string>com.apple.share-services</string>
</dict>
...

// 수정된 Info.plist
...
<dict>
    <key>NSExtensionAttributes</key>
    <dict>
        <key>NSExtensionActivationRule</key>
        <string>TRUEPREDICATE</string>
    </dict>
    <key>NSExtensionPointIdentifier</key>
    <string>com.apple.share-services</string>
    <key>NSExtensionPrincipalClass</key>
    <string>EntryViewController</string>
</dict>
...
ShareViewController 수정
실제로 팝업 될 창인 ShareViewController를 수정해준다.
import UIKit

class ShareViewController: UIViewController {

    var sharingData:NSExtensionContext!

    override func viewDidLoad() {
        super.viewDidLoad()
        self.view.backgroundColor = .white
        self.navigationItem.title = "공유"
        self.navigationItem.leftBarButtonItem = UIBarButtonItem(barButtonSystemItem: .cancel, target: self, action: #selector(self.cancelButtonTapped(_:)))
        self.navigationItem.rightBarButtonItem = UIBarButtonItem(barButtonSystemItem: .done, target: self, action: #selector(self.shareButtonTapped(_:)))
    }

    override func viewWillAppear(_ animated: Bool) {
        super.viewWillAppear(animated)
        self.view.transform = CGAffineTransform(translationX: 0, y: self.view.frame.size.height)
        UIView.animate(withDuration: 0.3, animations: { () -> Void in
            self.view.transform = .identity
        })
    }

    @objc func cancelButtonTapped(_ sender: UIBarButtonItem) {
        self.hideExtensionWithCompletionHandler(completion: { _ in
            self.sharingData?.completeRequest(returningItems: nil, completionHandler: nil)
        })
    }

    @objc func shareButtonTapped(_ sender: UIBarButtonItem) {
        print("share")
    }

    func hideExtensionWithCompletionHandler(completion: @escaping (Bool) -> Void) {
        UIView.animate(withDuration: 0.3, animations: {
            self.navigationController!.view.transform = CGAffineTransform(translationX: 0, y: self.navigationController!.view.frame.size.height)
        }, completion: completion)
    }
}
클래스 선언부에서 상속받는 클래스를 UIViewController로 변경해주어야 원하는 풀스크린 뷰가 뜬다. 변경하지 않으면 기존의 ShareViewController인 작은 창이 뜨게 된다.
//기존
class ShareViewController: SLComposeServiceViewController { ... }

//변경
class ShareViewController: UIViewController { ... }
공유할 데이터는 선언된 변수인 sharingData에 담겨있으므로, 검증하여 share 하는 부분을 제작하면 된다.
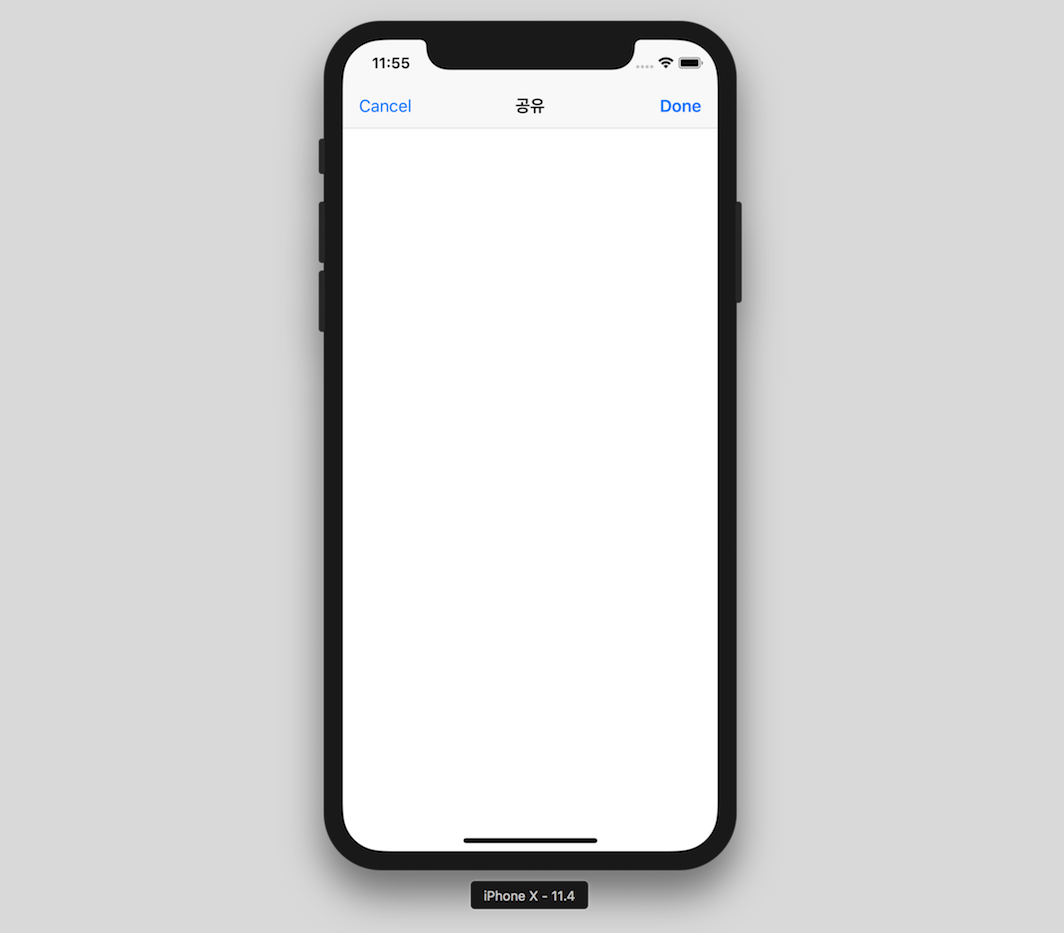
실행하면 다음과 같이 풀 스크린 공유 익스텐션을 확인할 수 있다.